Contents:
- What Is Ranunculus and Why Grow It?
- Understanding Ranunculus Corms: What to Buy and What to Avoid
- Corm Sizing and What It Means for Yield
- Eco-Friendly Sourcing
- The Complete Growing Ranunculus Guide: Climate, Timing, and Zone Planning
- Planting Times by USDA Hardiness Zone
- Overwintering Corms in Cold Climates
- Soil Preparation: Getting the Foundation Right
- How to Plant Ranunculus Corms: Step-by-Step
- Watering, Fertilizing, and Ongoing Care
- Irrigation Strategy
- Fertilizing During the Growing Season
- Pest and Disease Management
- When and How to Harvest Ranunculus for Maximum Vase Life
- Post-Harvest Handling
- Maximizing Yield: Getting More Stems from Each Plant
- Growing Ranunculus in Containers
- Sustainable Practices for the Ranunculus Garden
- Common Problems and How to Fix Them
- Corms Planted but No Sprouts After 4 Weeks
- Stunted Plants with Yellow Leaves
- Flowers Are Small and Stems Are Short
- Flowers Flopping Over in the Vase
- Ranunculus Varieties Worth Growing
- Frequently Asked Questions
- When should I plant ranunculus corms?
- How deep should I plant ranunculus corms?
- Why are my ranunculus corms rotting in the ground?
- How long do ranunculus last as cut flowers?
- Can I save ranunculus corms for next year?
- Planning Your Next Season
Ranunculus have a reputation for being fussy. You plant the corms, wait, and then — nothing. Or worse, rot. If you’ve lost a tray of corms to soggy soil or mistimed a planting, you’re not alone. Most failures come down to a handful of fixable mistakes, and once you understand what this flower actually needs, it becomes one of the most rewarding things you can grow.
This growing ranunculus guide covers everything: choosing and sourcing corms, soil preparation, planting timing by climate zone, irrigation, pest management, harvesting for maximum vase life, and how to get the most out of your investment. Whether you’re growing a few dozen corms in raised beds or scaling up for a cutting garden, the same principles apply.
What Is Ranunculus and Why Grow It?
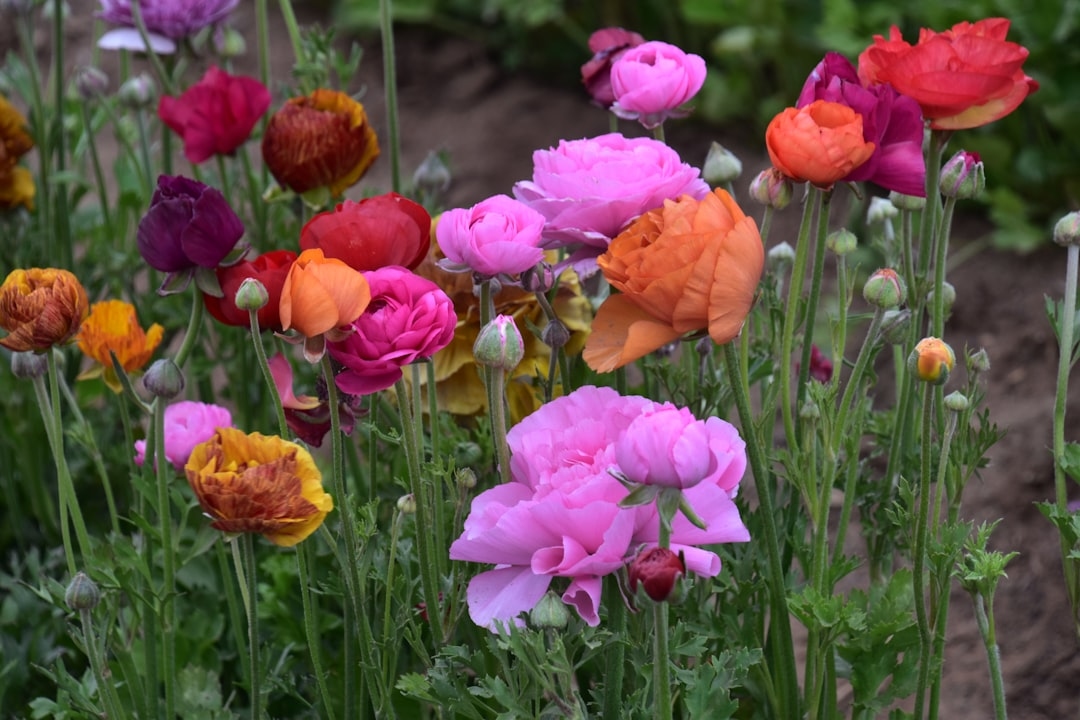
Ranunculus asiaticus — Persian buttercup — is a flowering plant native to the eastern Mediterranean, southwestern Asia, and southeastern Europe. It produces densely layered blooms that look almost architectural, with petals stacked in tight, paper-thin spirals. A single flower can have 40 to 100 petals, which is part of why florists charge a premium for them: a bunch of ten stems at a US flower shop typically runs $18 to $35, and at peak wedding season, they go higher.
Growing your own changes that math considerably. A bag of 50 corms costs roughly $15 to $30 depending on the supplier and grade. From 50 corms, a healthy planting in good conditions will yield anywhere from 150 to 250 stems over the course of a season. At even the low end of retail pricing, that’s a significant return on a small investment.
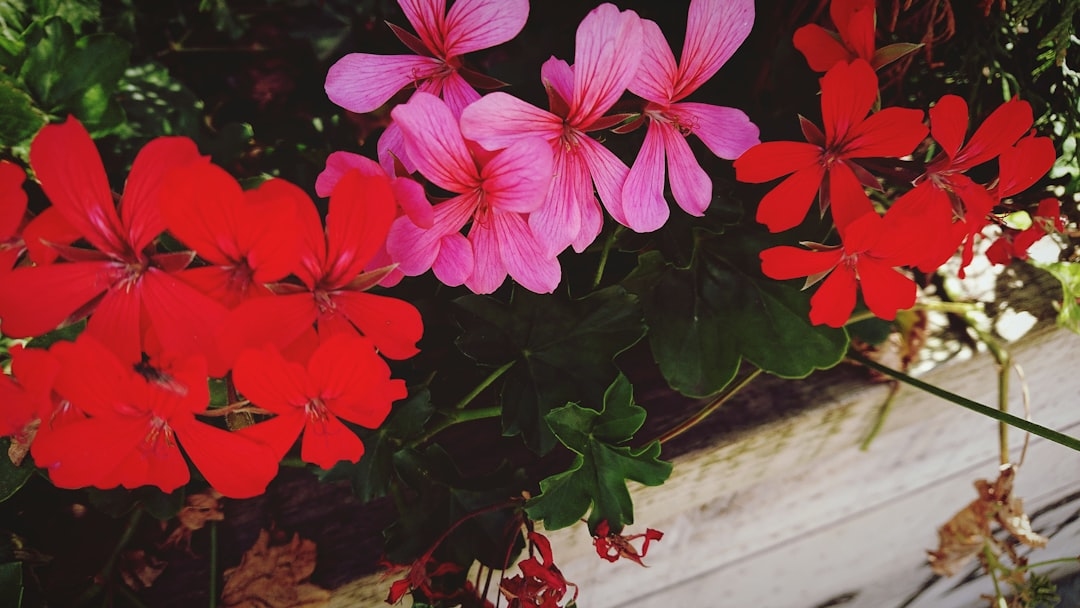
Beyond the economics, ranunculus are genuinely long-lasting in the vase — 10 to 14 days with proper post-harvest care — and they come in an extraordinary color range: coral, peach, blush, cream, white, deep burgundy, orange, yellow, and near-black tones. The Elegance and Amandine series from commercial breeders have pushed color consistency to a high standard. For a home cutting garden, the Aviv series offers strong performance in a range of climates.
Understanding Ranunculus Corms: What to Buy and What to Avoid
Ranunculus grow from corms — small, dry, octopus-shaped structures that look almost dead before they’re planted. Don’t let the appearance fool you. A quality corm has defined lobes, feels firm (not spongy), and shows no visible mold or soft spots. Avoid anything that’s shriveled to the point of feeling hollow, or that has visible gray or black rot at the growing tip.
Corm Sizing and What It Means for Yield
Corms are sold by size, typically measured by circumference: 4/5 cm, 5/6 cm, 6/7 cm, and 7+ cm (jumbo). Larger corms produce more stems per plant and larger blooms, but the price difference is real. For home gardens, 5/6 cm corms offer the best value-to-performance ratio. Jumbo corms are worth the premium if you’re growing for weddings or high-visibility arrangements where bloom size matters.
Most US suppliers sell ranunculus corms in counts of 25, 50, or 100. Reputable sources include Geos Corms, Longfield Gardens, and Swan Island Dahlias. Imported Italian and Dutch corms — particularly from the Liguria region — tend to be higher quality and more uniform than some domestic equivalents, though domestic sourcing is improving steadily.
Eco-Friendly Sourcing
When buying corms, ask suppliers whether they are grown without methyl bromide, a soil fumigant still used in some commercial bulb production overseas. It’s an ozone-depleting compound with significant environmental impact. Several US suppliers now explicitly market fumigant-free corms, and certified organic corms are available from small-batch growers, though they command a higher price. Buying domestically also reduces the shipping carbon footprint and supports smaller farming operations.
The Complete Growing Ranunculus Guide: Climate, Timing, and Zone Planning
Ranunculus are cool-season flowers. They thrive in temperatures between 45°F and 65°F and struggle once daytime temps consistently exceed 75°F. That temperature sensitivity is the single most important factor in planning your planting schedule.
Planting Times by USDA Hardiness Zone
In USDA Zones 8–10 (Southern California, the Gulf Coast, Pacific Northwest lowlands), ranunculus are planted in fall — typically October through December — for blooms in late winter to early spring, roughly February through April. This is the longest productive window and allows for the most stems per plant.
In Zones 6–7 (Mid-Atlantic, Pacific Northwest mid-elevations, parts of the South), planting happens in early spring — as soon as the soil is workable and nights stay above freezing, usually late February through March. Blooms arrive in May and June. You’re racing the summer heat, so earlier is always better.
In Zones 4–5 (Upper Midwest, New England, mountain states), spring planting is possible but the window is short. Start corms indoors 4 to 6 weeks before last frost, then transplant outside after danger of hard freeze passes. Expect blooms in June, and accept that the season will be compressed.
Row cover (1.5 oz fabric) extends the season meaningfully in colder zones — it can protect plants down to about 25°F and adds 2 to 4 degrees of warmth during cold nights. In Zone 6 and below, row cover at planting and again when frost threatens in early spring is standard practice for serious cut flower growers.
Overwintering Corms in Cold Climates
Ranunculus corms cannot survive frozen ground. In Zones 7 and colder, you have two choices: treat them as annuals and buy fresh corms each year, or dig and store them after the foliage dies back. To store: let the foliage yellow and dry, dig carefully with a fork, brush off soil, and cure in a warm, dry spot (around 70°F) for two weeks. Store in mesh bags with dry vermiculite in a cool, dry location (around 50°F). Replant in the fall or following spring. Stored corms typically perform well for two to three years before vigor declines.
Soil Preparation: Getting the Foundation Right
The number one cause of corm failure is wet, poorly drained soil. Ranunculus corms rot easily in standing water, particularly during the initial rooting phase. Before you plant a single corm, address drainage.
Ideal soil for ranunculus is loamy, loose, and fast-draining with a pH between 6.0 and 6.5. Heavy clay soils must be amended before planting — work in 3 to 4 inches of coarse sand and 2 to 3 inches of compost per 100 square feet, tilled to at least 12 inches deep. Raised beds are the simplest solution for gardeners with difficult native soil; a 6-inch raised bed with a mix of topsoil, compost, and perlite (roughly 60/30/10 by volume) drains reliably and warms up faster in spring.
Add a balanced slow-release fertilizer at planting — something like a 5-10-10 or 4-8-8 formulation at the manufacturer’s recommended rate. Phosphorus supports root and corm development; excess nitrogen encourages leafy growth at the expense of blooms. If you’re gardening organically, bone meal (for phosphorus) and kelp meal (for micronutrients) applied at planting are effective alternatives.
🌿 What the Pros Know
Commercial cut flower farmers in California and the Pacific Northwest often pre-soak ranunculus corms for 3 to 4 hours in room-temperature water before planting. This rehydrates the corms and jumpstarts root initiation — leading to sprouts in 10 to 14 days rather than 20 to 25. Some growers add a diluted seaweed extract (like Maxicrop at 1 tsp per gallon) to the soak for an added hormonal boost. Don’t soak longer than 4 hours, though — waterlogged corms are more susceptible to rot in wet soil conditions.
How to Plant Ranunculus Corms: Step-by-Step
Planting ranunculus correctly takes about ten minutes once you understand the orientation. The corms go in with the points — the claw-like lobes — facing downward. This is the opposite of what looks intuitive, and planting them upside down is a surprisingly common mistake. The growing tip is the rounded, slightly flatter side that faces up.
- Soak corms (optional but recommended): 3 to 4 hours in room-temperature water, then plant immediately.
- Dig planting holes 1.5 to 2 inches deep. In heavy soil, err toward shallower — 1 inch is fine if drainage is poor.
- Space corms 6 to 9 inches apart in all directions. Tighter spacing (6 inches) is fine in enriched soil and produces a fuller look. Wider spacing (9 inches) allows better air circulation and reduces fungal risk.
- Place corms claws-down in the hole. Cover with soil and firm gently.
- Water in thoroughly after planting, then hold back irrigation until sprouts appear — typically 2 to 3 weeks. Wet, cold soil with no active roots is prime rot territory.
In beds, plant in a grid pattern rather than rows for efficient use of space and a fuller visual effect. A 4×8 foot bed accommodates roughly 40 to 50 corms at 6-inch spacing — enough to keep a household in fresh flowers for six to eight weeks.
Watering, Fertilizing, and Ongoing Care
Irrigation Strategy
Once sprouts are up, consistent moisture matters — but ranunculus roots are shallow and don’t tolerate drought well once in active growth. Aim to keep the top 4 to 6 inches of soil evenly moist but never waterlogged. In practice, that means checking soil moisture every two to three days and watering when the top inch feels dry.
Drip irrigation or soaker hoses are significantly better than overhead watering for ranunculus. Wet foliage and flowers invite botrytis (gray mold), especially in humid climates or when nights are cool and damp. If you’re hand-watering, water at the base of the plant in the morning so any splashed foliage has time to dry before evening.
Fertilizing During the Growing Season
After sprouts emerge, begin a light fertilization program. A liquid fertilizer with higher phosphorus and potassium than nitrogen — such as a bloom-formula 5-15-14 or similar — applied every two weeks at half the recommended rate works well. Over-fertilizing with nitrogen produces lush, dark green leaves and small, weak flowers. Dial back nitrogen as soon as bud development begins.
One affordable and effective option: compost tea applied as a soil drench every two to three weeks. It provides a broad spectrum of micronutrients and beneficial microbes at essentially zero cost if you’re already composting. A 5-gallon bucket brewed for 24 hours and diluted 1:10 with water can treat a 50-square-foot bed.
Pest and Disease Management
Aphids are the most common pest problem on ranunculus — they colonize new growth rapidly in spring. A strong spray of water knocks most of them off, and insecticidal soap at 1 tablespoon per quart of water is effective for heavier infestations. Avoid broad-spectrum pesticides that kill beneficial insects, including the predatory wasps that naturally manage aphid populations.
Botrytis (gray mold) is the primary disease concern, especially in damp conditions. Prevention beats treatment: space plants for airflow, avoid overhead watering, and remove dead or dying foliage promptly. If botrytis appears, remove affected plant parts immediately and improve ventilation. A copper-based fungicide can slow spread in severe cases.
Powdery mildew occasionally affects ranunculus late in the season, particularly as temperatures warm. It’s rarely fatal to the plant, but it signals that the season is winding down. At that point, focus energy on harvesting remaining blooms rather than treating the mildew.
When and How to Harvest Ranunculus for Maximum Vase Life
Harvest timing is where many home growers leave vase life on the table. The instinct is to cut flowers when they’re fully open — colorful, showy, clearly ready. But that’s actually too late for maximum longevity.
Cut ranunculus when the buds are showing full color but the petals are still tightly wrapped — what florists call the “marshmallow stage.” At this point the bud is soft and slightly squishy when gently squeezed, but the petals haven’t unfolded yet. Stems cut at this stage will open over two to three days and last 10 to 14 days in the vase. Stems cut fully open typically last 5 to 7 days.
Post-Harvest Handling
- Cut in the morning, after overnight temperatures have cooled the stems. Avoid harvesting during the heat of midday.
- Use clean, sharp scissors or snips. Ragged cuts cause stem cell damage and reduce water uptake. Sanitize blades between plants if disease is present in your garden.
- Cut at an angle, leaving as much stem length as possible — ideally 10 to 14 inches. Ranunculus stems are hollow and fragile; handle gently.
- Place immediately into cool water in a clean bucket. Condition stems in a cool, dark location (40–50°F) for at least 4 hours, or overnight, before arranging.
- Change vase water every two days and recut stems at each change. Remove any foliage below the waterline — submerged leaves decompose quickly and foul the water.
Commercial flower food (the packets that come with grocery store flowers) contains three things: a sugar for energy, an acidifier to lower water pH, and a biocide. You can approximate this with a homemade version: 1 tablespoon sugar, 1 tablespoon white vinegar or lemon juice, and 1/4 teaspoon bleach per quart of water. It’s not quite as refined as commercial preparations, but it’s effective and costs pennies.
Maximizing Yield: Getting More Stems from Each Plant
Ranunculus are indeterminate in their blooming — a healthy plant will keep producing stems as long as conditions favor growth and you keep harvesting. The key is cutting regularly. Leaving mature flowers on the plant signals it to slow down stem production. Harvest every two to three days during peak bloom, even if you don’t need the flowers — give them away, compost them, or dry them. Consistent harvesting keeps the plant productive.
Each corm typically produces between 4 and 7 harvestable stems over a season in good conditions, with peak production in the first four to six weeks after initial flowering. After that, stem length and bloom size tend to decline as temperatures rise. This is normal, not a failure — it’s the plant responding to its natural cycle.
To push production, some growers pinch out the very first bud that develops on each plant — sacrificing that initial bloom to encourage a more vigorous branching response. Research from UC Cooperative Extension in California suggests that pinching the first bud can increase total stem count by 15 to 25% over the season. It’s a small loss early for a larger gain overall.
Growing Ranunculus in Containers
Container growing is entirely viable and has one major advantage: you can move pots to optimize temperature, light, and shelter. Use containers at least 10 inches deep with drainage holes — 12 inches is better. Shallow containers restrict root development and heat up faster, which shortens the productive season.
A standard 12-inch pot holds 3 to 5 corms at 4-inch spacing. Use a well-draining potting mix — a blend of quality potting soil and 20% perlite works well. Avoid using straight garden soil in containers, as it compacts, drains poorly, and is heavy to move.
Container plants dry out faster than in-ground plantings, so check moisture daily once in active growth. Feed more frequently than in-ground plants — every 10 to 14 days with a diluted liquid bloom fertilizer — because nutrients leach out with each watering. The payoff is flexibility: you can move containers under cover during late cold snaps, and you can position them for the best display wherever you need color.
Sustainable Practices for the Ranunculus Garden
A ranunculus cutting garden can be run with minimal synthetic inputs and a small environmental footprint. Here’s what that looks like in practice.
Compost heavily. Building organic matter in your planting beds over multiple seasons improves drainage in clay soils, moisture retention in sandy soils, and biological activity that suppresses some soil-borne pathogens. Compost is also free if you’re making it from kitchen and garden waste.
Skip the plastic mulch. Conventional flower farming relies heavily on black plastic mulch for weed suppression and soil warming. At home scale, a 2-inch layer of straw mulch applied after corms sprout achieves similar soil temperature stabilization, suppresses weeds, and breaks down to add organic matter. It also supports ground beetles and other beneficial insects that plastic mulch eliminates.
Attract beneficial insects. Aphid pressure on ranunculus drops significantly when predatory insects — lacewings, ladybugs, parasitic wasps — are present in your garden. Interplanting with shallow-flowered nectar plants like sweet alyssum, phacelia, or cilantro in flower attracts these beneficials at essentially no cost and without any chemical inputs.
Save and store corms. Rather than buying new corms every year, dig and store them. It reduces packaging waste, eliminates shipping, and after three to four years of selection, you’ll have corms that are increasingly adapted to your specific growing conditions.
Common Problems and How to Fix Them
Corms Planted but No Sprouts After 4 Weeks
Check soil temperature first. If soil is consistently below 40°F, corms will sit dormant. Wait. If soil temperature is appropriate (45–60°F) and there’s still no growth, carefully excavate one corm and examine it. If it’s firm, it may simply be slow — replant and wait another two weeks. If it’s soft, mushy, or smells bad, rot has set in. Remove affected corms, improve drainage, and replant fresh corms if the season allows.
Stunted Plants with Yellow Leaves
Yellowing leaves on young ranunculus plants most commonly indicate overwatering or nitrogen deficiency. Check drainage first. If drainage is fine and the soil is appropriately moist, apply a diluted balanced liquid fertilizer. If only the lower leaves are yellowing while upper leaves remain green, this is normal leaf senescence and not a problem.
Flowers Are Small and Stems Are Short
This almost always reflects heat stress. Once daytime temperatures exceed 75°F regularly, ranunculus plants redirect energy toward seed production and away from vegetative and floral growth. The season is winding down. Harvest everything at the marshmallow stage and enjoy what you have — you’re at the end of the productive window.
Flowers Flopping Over in the Vase
Ranunculus stems are hollow and somewhat fragile. Flopping typically means the stems are dehydrated. Recut the stems under water (to prevent air pockets from forming in the hollow stem) and place in fresh, cool water for several hours. Wilted but otherwise healthy stems often recover fully. If stems are rotting at the cut end, the vase water was contaminated — sanitize the vase and start fresh.
Ranunculus Varieties Worth Growing
The variety landscape for ranunculus has expanded significantly in the last decade. Here are the series worth knowing.
- Amandine Series: The gold standard for home cut flower production. Strong stems, large blooms, excellent color range. Available in individual colors and mixed packs. Reliable germination from quality suppliers.
- Aviv Series: Bred for cooler growing conditions. Performs particularly well in Zones 6–7 where the spring window is short. Bloom size is slightly smaller than Amandine but stem production is high.
- Elegance Series: Italian breeding, known for especially refined color range including some of the best blush and peach tones available. Slightly more expensive but worth it for color-specific arrangements.
- Cloni Series: Developed by Re Fiori in Italy, the Cloni series features exceptionally large, high-petal-count blooms. These are the varieties you see in high-end floral design publications. Corms are expensive but the blooms justify the price for special occasions.
- Tecolote Series: A California-developed series bred specifically for West Coast growing conditions. Highly heat tolerant relative to other ranunculus. A good choice for Zone 9 and 10 gardeners looking to extend the season.
Frequently Asked Questions
When should I plant ranunculus corms?
Plant ranunculus corms in fall (October–December) in USDA Zones 8–10 for winter and spring blooms. In Zones 6–7, plant in early spring as soon as the soil is workable and temperatures stay above freezing. In Zones 4–5, start corms indoors 4 to 6 weeks before last frost and transplant out after hard freeze danger has passed.
How deep should I plant ranunculus corms?
Plant ranunculus corms 1.5 to 2 inches deep with the claw-like lobes pointing downward. In heavy or poorly draining soil, plant shallower — 1 inch — to reduce rot risk. Space corms 6 to 9 inches apart in all directions.
Why are my ranunculus corms rotting in the ground?
Corm rot is almost always caused by poor drainage or overwatering during the initial rooting phase. After planting, water once thoroughly and then hold back irrigation until sprouts appear. Make sure planting beds drain freely — raised beds or amended soil with added coarse sand and perlite significantly reduce rot risk.
How long do ranunculus last as cut flowers?
Ranunculus cut at the marshmallow stage — when buds show full color but petals are still tightly wrapped — last 10 to 14 days in a vase with clean water and regular stem recutting. Flowers cut fully open typically last 5 to 7 days. Keeping arrangements away from heat, direct sunlight, and ethylene-producing fruit extends vase life further.
Can I save ranunculus corms for next year?
Yes. After foliage dies back naturally, dig the corms carefully, brush off soil, and cure them in a warm, dry location (around 70°F) for two weeks. Store in mesh bags with dry vermiculite at around 50°F. Properly stored corms remain viable for two to three years and can be replanted the following season.
Planning Your Next Season
Ranunculus rewards planning more than most flowers. The gardeners who get the best results order corms in summer — before the best varieties and sizes sell out — and spend the late summer months building and amending their beds so the soil is ready when planting time comes. They track bloom dates, note which varieties outperformed, and adjust spacing or timing the following year based on actual data from their garden.
Start a simple garden log: note planting date, corm size and variety, soil temperature at planting, first sprout date, first bloom date, and approximate stem count per plant. After two seasons, you’ll have more useful information about what works in your specific climate and conditions than any general guide can provide.
If you’re new to ranunculus, start with 25 to 50 corms of a reliable variety like Amandine or Aviv, focus on getting the drainage and planting depth right, and resist the urge to overwater. Get that first season under your belt. The second season, you’ll know exactly where to push.