Contents:
- Understanding the Three Main Iris Varieties: A Care Guide Foundation
- Bearded Irises: Growing Tips for the Most Popular Variety
- Planting Bearded Irises the Right Way
- Watering and Fertilizing
- Dividing Bearded Irises: When and How
- Siberian Irises: Hardy, Low-Maintenance, and Underrated
- Soil and Sun Requirements for Siberian Irises
- Division Schedule and Long-Term Care
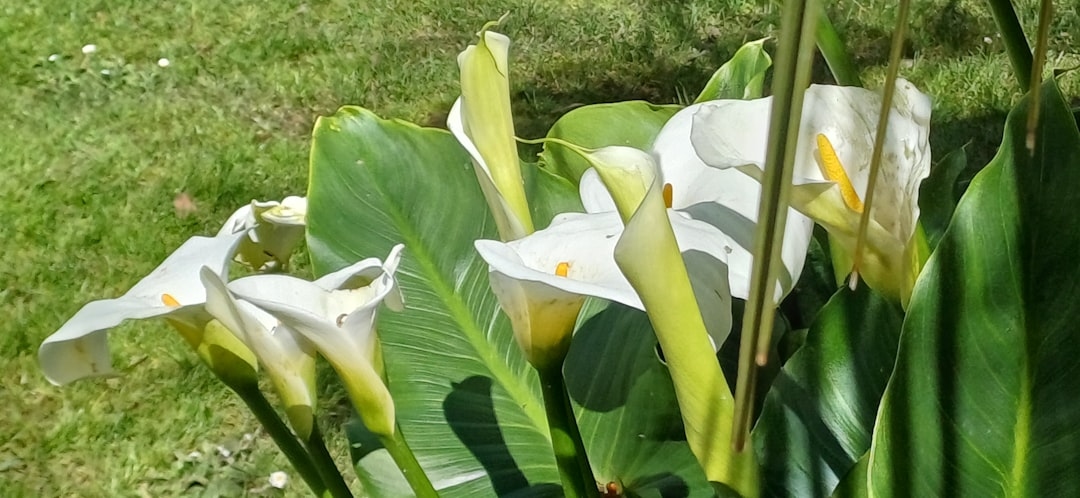
- Japanese Irises: Spectacular Blooms for Moist Gardens
- Moisture and Drainage: The Japanese Iris Balance
- Feeding Japanese Irises
- Practical Tips for Growing All Three Iris Types on a Budget
- Source Rhizomes Smartly
- Soil Improvement Without Breaking the Bank
- Eco-Friendly Pest Management
- Extending the Bloom Season
- Common Problems and How to Fix Them
- Yellowing Leaves
- Failure to Bloom
- Soft, Mushy Rhizomes
- FAQ: Iris Varieties Care Guide
- How deep should I plant iris rhizomes?
- How often do irises need to be divided?
- Can irises grow in shade?
- What is the difference between bearded and Siberian irises?
- Are irises deer-resistant?
- Planning Your Iris Garden: Next Steps
Here’s a myth worth busting right away: irises are fussy, high-maintenance flowers best left to experienced gardeners with deep pockets. This iris varieties care guide exists to prove otherwise. Irises are among the most forgiving, budget-friendly perennials you can grow — and once you understand the differences between the three major types, you’ll wonder why you waited so long to plant them.
These flowers have been cultivated for over 3,000 years, appearing in ancient Egyptian frescoes and French royal emblems alike. Today, the American Iris Society recognizes more than 30,000 registered cultivars. Yet most home gardeners only ever encounter one or two types at the nursery and make planting decisions based on guesswork. That gap between what’s available and what people actually know is exactly what this guide fills.
We’ll cover the three varieties you’re most likely to grow in the US — bearded, Siberian, and Japanese — with specific planting depths, sun requirements, soil preferences, division schedules, and pest strategies. No vague advice. No filler. Just the information you need to get blooms every year without overspending.
Understanding the Three Main Iris Varieties: A Care Guide Foundation
Before you buy a single rhizome or bulb, it helps to know that not all irises want the same things. Lumping them together is the number one reason gardeners end up disappointed. Here’s a quick orientation:
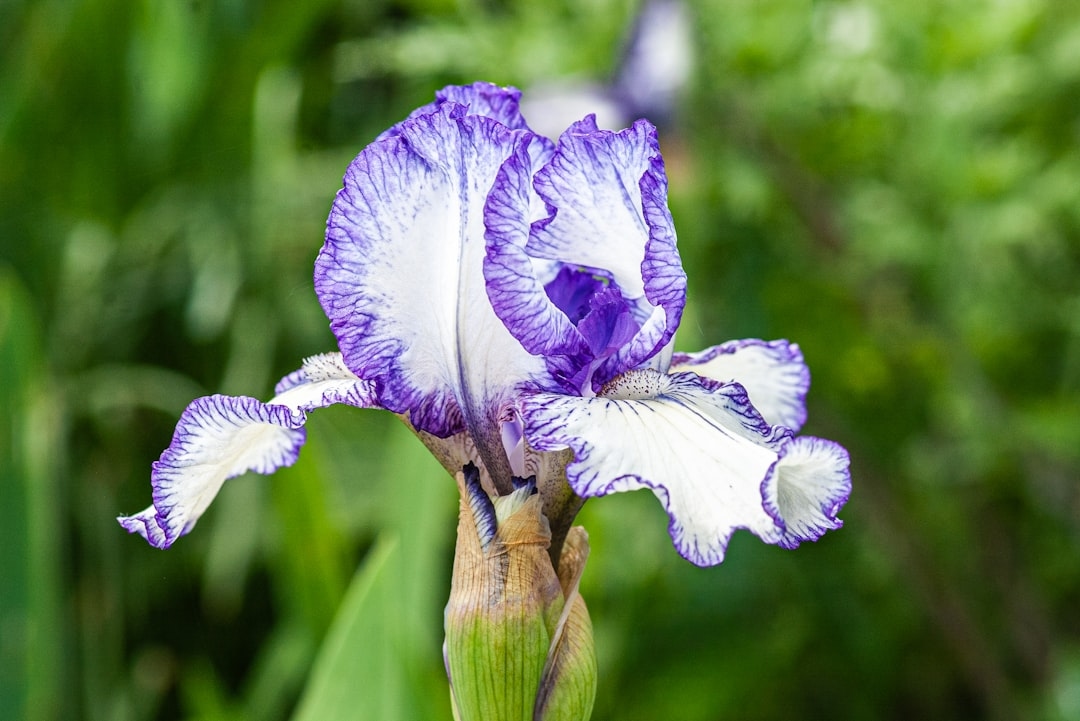
- Bearded irises (Iris germanica and its hybrids) are the classic, ruffled showstoppers. They get their name from the fuzzy “beard” on each fall petal.
- Siberian irises (Iris sibirica) are sleeker, more upright, and remarkably tough — they thrive across USDA Hardiness Zones 3–9.
- Japanese irises (Iris ensata) produce the largest blooms of the three, often 6–8 inches across, and they love moisture more than the others.
The care overlap between these three is real — all need good drainage (except Japanese irises, which tolerate wet feet), full sun to light shade, and division every few years. But their differences are what determine success or failure. Planting a bearded iris in a boggy spot kills it. Growing a Japanese iris in thin, dry soil produces weak blooms. Getting this right costs nothing extra — it’s purely about placement.
Bearded Irises: Growing Tips for the Most Popular Variety
If you’ve ever seen irises at a neighbor’s fence line, they were almost certainly bearded irises. These are the workhorses of the genus — widely available, inexpensive (rhizomes typically run $3–$8 each at garden centers, less when divided from a friend’s garden), and capable of producing dozens of blooms per clump in peak years.
Planting Bearded Irises the Right Way
The single most common mistake with bearded irises is planting the rhizome too deep. Unlike most perennials, bearded iris rhizomes need to sit at or just slightly below the soil surface — no more than 1 inch deep in northern zones, and actually exposed to sunlight in hot southern climates (Zone 7 and above). The rhizome needs sun to “bake,” which triggers next year’s bloom set. Plant them in full sun — at least 6 hours daily — in well-draining, slightly alkaline soil with a pH between 6.8 and 7.0.
Spacing matters more than people expect. Give each rhizome 12–24 inches of breathing room. Crowded clumps bloom less and become more vulnerable to iris borer, the most destructive pest these plants face.
Watering and Fertilizing
Established bearded irises are drought-tolerant once their roots are set — typically after the first full growing season. During their first year, water weekly if rainfall is below 1 inch. After that, they largely fend for themselves in most of the continental US.
Fertilize sparingly. A low-nitrogen fertilizer (something like a 5-10-10 ratio) applied in early spring and again right after blooming is plenty. High nitrogen pushes leafy growth at the expense of flowers and increases rot risk in the rhizomes. A 10-pound bag of low-nitrogen fertilizer covers most home gardens for two full seasons — a genuinely budget-friendly input.
Dividing Bearded Irises: When and How
Divide bearded irises every 3–4 years, ideally in late July through September after blooming has finished and the heat of summer begins to ease. This gives the divisions time to establish roots before frost. Each division should include at least one healthy “fan” of leaves attached to a firm rhizome section. Trim the leaves to about 6 inches to reduce transplant stress.
Here’s the budget angle: a single clump that cost you $5 four years ago can yield 8–12 divisions. Replant what you need, share the rest with neighbors, or sell surplus at a local plant swap. Many gardeners recoup their initial investment within two division cycles.
Siberian Irises: Hardy, Low-Maintenance, and Underrated
Siberian irises don’t get nearly enough credit. They’re cold-hardy to Zone 3 (surviving temperatures as low as -40°F), largely pest-resistant, and produce elegant, orchid-like blooms in shades of purple, blue, white, and yellow. They’re also deer-resistant — a genuine selling point for gardeners in suburban and rural areas where bearded irises often get munched.
Margaret Liu, a garden writer who lives outside Minneapolis, shared her experience in an online forum that stuck with me: she’d battled iris borers in her bearded iris bed for three consecutive seasons, spending over $60 on pesticides with mixed results. On a neighbor’s advice, she planted a row of Siberians along her fence line. Four years later, she’s never treated them for pests once, and they bloom reliably every May — right alongside her tulips.
Soil and Sun Requirements for Siberian Irises
Siberian irises prefer slightly acidic soil — a pH between 5.5 and 7.0 — and tolerate a wider range of moisture conditions than bearded irises. They’ll grow in average garden soil, moist borders near ponds, or even in rain gardens. Full sun produces the most blooms, but they’re one of the few irises that genuinely perform well in partial shade (4–5 hours of direct sun), making them versatile for tricky spots.
Plant Siberian iris rhizomes about 1–2 inches deep, slightly deeper than bearded types, with the crown just at or barely below the soil surface. Space clumps 18–24 inches apart.
Division Schedule and Long-Term Care
Here’s where Siberians diverge from their bearded cousins: they resent being disturbed. Divide them only when the center of the clump begins to die out — usually every 5–7 years. Division is best done in early spring or fall. The roots are dense and fibrous, so a sharp spade or garden fork is essential. Some gardeners use two forks back-to-back to pry clumps apart.
After dividing, replant immediately and water well. Siberians take a year to fully re-establish and may not bloom the first spring after division — completely normal, and no cause for panic.
Japanese Irises: Spectacular Blooms for Moist Gardens
Japanese irises are the drama queens of the genus, and they earn the title. Their flat, wide blooms — sometimes reaching 8–10 inches in diameter — appear in June and July, right when most other spring bloomers have faded. They come in stunning combinations of purple, lavender, white, pink, and bi-colors, often with intricate veining.
“Japanese irises are the most rewarding irises I grow, but they require the most attention to soil chemistry,” says Dr. Patricia Wren, a certified horticulturist and former extension agent based in Oregon who now consults for home gardeners. “Most failures I see come down to pH — people plant them in alkaline soil and wonder why the leaves yellow and growth stalls. These plants need acidic conditions, ideally between 5.5 and 6.5, and they’ll tell you immediately when something’s off.”
Moisture and Drainage: The Japanese Iris Balance
Japanese irises are unique in that they can tolerate — and even enjoy — standing water during their active growing and blooming season (spring through midsummer). Pond margins, rain garden edges, and low spots that collect runoff are ideal placements. However, they do not want to sit in water during winter dormancy. Soggy, cold soil in winter causes crown rot.
If your garden doesn’t have a naturally moist area, you can replicate the conditions by amending the soil heavily with compost (aim for 30–40% organic matter by volume) and watering deeply once or twice a week during dry spells in spring and early summer.
Feeding Japanese Irises
These heavy feeders benefit from a balanced fertilizer (10-10-10) applied in early spring as new growth emerges, then a second application right after blooming. Avoid fertilizers that contain lime or wood ash — both raise soil pH in ways that directly harm Japanese irises. If your soil tests above pH 6.5, add granular sulfur at the rate recommended on the package for your soil type to bring it down gradually over one season.
Practical Tips for Growing All Three Iris Types on a Budget
You don’t need to spend a lot to grow spectacular irises. The strategies below work across all three types and keep costs low year after year.
Source Rhizomes Smartly
The American Iris Society hosts local chapter sales every spring and fall across the US, where named cultivars often sell for $1–$3 per division — a fraction of mail-order prices. Nextdoor, Facebook Marketplace, and local plant swap groups are also excellent sources. Gardeners with established beds routinely give away divisions rather than compost them.
If you do buy mail-order, look for bare-root rhizomes shipped in summer (for bearded types) — these establish better than potted plants and cost significantly less per plant. Reputable specialty nurseries like Schreiner’s Iris Gardens (Oregon) and Ensata Gardens (Michigan, specializing in Japanese irises) ship healthy, well-labeled stock.
Soil Improvement Without Breaking the Bank
Good soil preparation is the highest-return investment in iris gardening. A $12 bag of compost worked into a 4×4-foot planting area does more for long-term success than $40 worth of specialty fertilizers. For bearded irises in clay-heavy soils, adding coarse sand (not fine play sand) at a 1:1 ratio with compost dramatically improves drainage.
Test your soil before amending it. Many US county extension offices offer soil testing for $10–$20, giving you a precise pH and nutrient profile. Guessing at amendments wastes money and can cause more problems than it solves.
Eco-Friendly Pest Management
Iris borer is the primary pest threat for bearded irises in the eastern US. The larvae tunnel into rhizomes, causing rot and potentially introducing bacterial soft rot as a secondary problem. The good news: you can manage them without synthetic pesticides.
In fall, cut back and remove all iris foliage and dispose of it (don’t compost it — borer eggs overwinter in leaf litter). In early spring, a single application of spinosad-based organic insecticide, timed when leaves are 4–6 inches tall, kills newly hatched larvae before they burrow into rhizomes. Neem oil works as a deterrent applied every 10–14 days during the same window. Both options are significantly less toxic to pollinators than synthetic pyrethroids and cost roughly the same.
For a completely chemical-free approach, hand-squish egg masses found on leaves in April (look for tiny, ridged, cream-colored eggs near leaf bases) and squish any larvae you find when dividing rhizomes. It’s not glamorous, but it’s free and effective for small plantings.
Extending the Bloom Season
The three iris types naturally stagger their bloom times, and planting all three is the simplest way to extend your iris season from April through July without spending more on other flower types:
- Bearded irises: Bloom primarily in May (with reblooming types adding a second flush in September in Zones 5–9)
- Siberian irises: Bloom in late May to June, slightly after peak bearded season
- Japanese irises: Bloom in June to July, bridging the gap to summer perennials
Reblooming bearded iris cultivars — varieties like ‘Immortality’ (white), ‘Harvest of Memories’ (yellow), and ‘Clarence’ (blue-violet) — cost the same as standard bearded types but deliver two flower shows per year. They require a bit more fertilization to fuel the second bloom, but the value-per-dollar is hard to beat.
Common Problems and How to Fix Them
Yellowing Leaves
Yellow leaves in irises usually point to one of three causes: overwatering, wrong soil pH, or iris leaf spot (a fungal disease). For bearded irises, check that the soil drains freely and the rhizome top isn’t buried. For Japanese irises, test the pH — yellowing with green veins (chlorosis) is a classic sign of alkaline soil. Leaf spot shows as tan spots with water-soaked margins; remove affected leaves and improve air circulation around the plant.
Failure to Bloom
The most common reason irises don’t bloom is overcrowding. A clump that’s been in place more than 4–5 years without division exhausts the soil around it and produces fewer flowers each year. Other causes include too much shade (less than 6 hours for bearded types), planting rhizomes too deep, or applying excessive nitrogen fertilizer. Check all four variables before concluding something is seriously wrong.
Soft, Mushy Rhizomes
Soft rot, caused by the bacteria Erwinia carotovora, is the most destructive disease affecting bearded irises. It smells unpleasant and spreads quickly in warm, wet conditions. If you find affected rhizomes, dig them out immediately, cut away all soft tissue back to firm, healthy flesh, and dust the cut surface with powdered sulfur before replanting. Do not replant in the same spot without first improving drainage.
FAQ: Iris Varieties Care Guide
How deep should I plant iris rhizomes?
Bearded iris rhizomes should be planted with the top of the rhizome at or just barely below the soil surface — no more than 1 inch deep, and sometimes exposed entirely in Zones 7 and above. Siberian irises go 1–2 inches deep. Japanese irises should be planted 2 inches deep. Planting too deep is the leading cause of poor blooming in bearded irises.
How often do irises need to be divided?
Bearded irises need division every 3–4 years, ideally in late summer (July–September). Siberian irises can go 5–7 years between divisions and should be divided only when the center of the clump dies out. Japanese irises fall in the middle — divide every 4–5 years in early spring or early fall.
Can irises grow in shade?
Bearded irises need a minimum of 6 hours of direct sun and struggle in shade. Siberian irises are the most shade-tolerant of the three, performing adequately with 4–5 hours of sun. Japanese irises prefer full sun but tolerate light afternoon shade in hot climates (Zone 7 and above), where shade actually helps prevent bloom stress.
What is the difference between bearded and Siberian irises?
Bearded irises have wide, ruffled petals with a fuzzy “beard” at the center of each fall petal, and they grow from thick, surface-level rhizomes. Siberian irises have narrower, more upright blooms with no beard, grow from fibrous root clumps, tolerate colder temperatures (to Zone 3), and are largely pest-resistant. Bearded irises need alkaline, dry soil; Siberians tolerate acidic, moist conditions.
Are irises deer-resistant?
Siberian and Japanese irises are generally deer-resistant due to their tough, fibrous foliage. Bearded irises are moderately deer-resistant — deer occasionally sample the blooms in early spring when other food sources are scarce, but they’re not a preferred target. In high-deer-pressure areas, Siberian irises are the safest choice among the three.
Planning Your Iris Garden: Next Steps
The best time to plant bearded irises is late summer — July through September — when nurseries are selling fresh divisions and the soil is warm enough to encourage root establishment before frost. Siberians and Japanese irises can go in the ground in either early spring or early fall. If you’re starting from scratch, a mix of all three types — say, five bearded rhizomes, three Siberian clumps, and two Japanese irises — can be assembled for under $50 from local plant swaps and regional specialty nurseries.
That $50 investment, divided and shared over 10 years, can fill an entire garden bed and stock a dozen neighbors’ yards. Irises multiply reliably, reward basic care with spectacular results, and cost less to maintain than almost any other flowering perennial. The only real expense is time — and even that’s minimal once the plants are established.
Start with one type if you’re new to irises. Bearded varieties are the most forgiving for beginners. Add Siberians the following year for extended bloom time, then Japanese irises once you have a feel for managing soil moisture and pH. Your garden — and your budget — will thank you for the patience.